Don't start mass production if the first piece fails! Screen printing initial inspection requires consistently checking these 5 steps.
After working in screen printing for a long time, you'll develop a habit: no matter how good the proof looks, don't take it seriously. You only feel at ease after the first few official prints are printed.
The easiest mistake for beginners is thinking about maximizing output as soon as they turn on the printer. After printing dozens of sheets, they realize the design is blurry, the registration is off, and the ink is too light, rendering the entire stack of stock unusable, with no way to rework it. The experienced printers' rules may sound rigid, but they really work—if the first print job isn't good, no subsequent prints are allowed.
Each screen printing job relies on the screen tension, screen distance, and ink viscosity. If these parameters deviate even slightly, the flaws will be immediately apparent on the first print. I usually print a few blank sheets of scrap paper first to get the ink flowing smoothly, then print 3-5 sheets as the first print, and then proceed step by step.
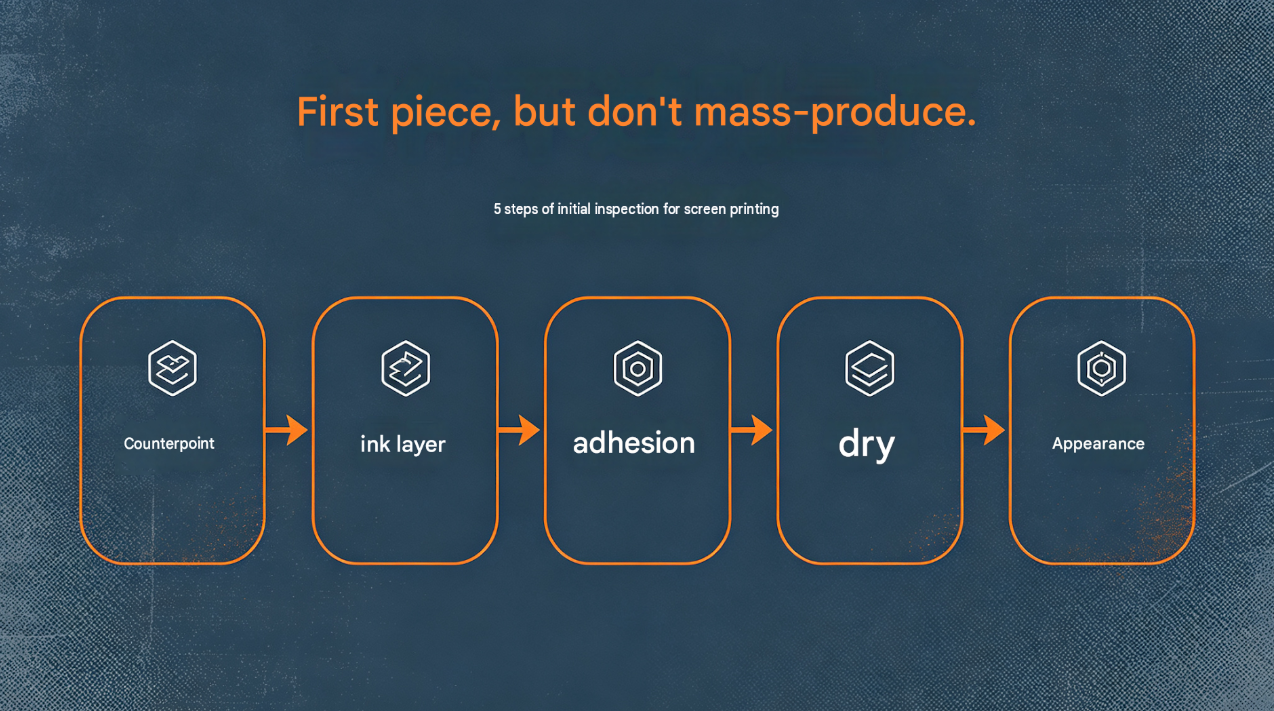
Five steps for initial inspection, one step at a time.

Figure 2. Holding the first piece up to the light for inspection: verifying registration and checking the uniformity of the ink layer.
First, check the alignment. Check if the pattern is aligned with the baseline and the positioning edge of the substrate; for multi-color printing, check each color one by one, and the misalignment must be controlled within 0.15mm to be considered acceptable. If it is even slightly off, you have to go back and readjust the screen distance.
Next, examine the ink layer. If the ink is too thick, it will blur the print; if it's too thin, the ink will show through. I usually hold the paper up to the light and rotate it to check the evenness of the ink color, then run my hand over it to ensure the entire sheet is of uniform thickness.
Don't skip the adhesion test. First, scratch it a couple of times with your fingernail, then cut a piece of 3M tape, stick it firmly, and peel it off sharply. It's only acceptable if no ink or color comes off. For difficult-to-adhere materials like plastic, metal, and glass, I test it every time. Skipping this step will result in reworking the entire batch later.
Then confirm drying. It should not feel sticky to the touch, and two sheets should not rub together when stacked. For UV inks, check if they have fully cured; for solvent-based inks, time the drying time.
Finally, give the overall appearance a thorough check: pinholes, bubbles, streaks, jagged edges—don't miss a single one, and make sure the edges of the pattern are clean and crisp.

Figure 3. 3M tape tear test: Adhesion is considered (qualified) only if no ink or color comes off.
After completing the five steps, select the first piece, write the date on it, and attach it to the process card. Then, check it against the process card every time you start work. Regardless of who starts the machine, the standard is always the same.
Quick Reference Checklist (Save the image if you like)
l Print 3-5 copies for the first item; do not increase production if the print run is not satisfactory.
l Alignment: Check each color individually; only allow for misalignment ≤ 0.15mm.
l Ink layer: Check uniformity against the light, feel thickness by hand; it should not be blurred or show the base layer.
l Adhesion: Scratched with a nail and then peeled off with 3M tape, no ink or color fading.
l Drying: Not sticky to the touch, no scratches; UV curing time depends on the degree of curing, solvent-based products depend on surface dryness.
l Appearance: Inspect for pinholes, bubbles, stringiness, and jagged edges; edges should be clear.
l Leave a dated first piece and attach a process card; check and verify the date on each shift.
#Screen printing #Screen printing machine #Printing process #Printing equipment #Screen printing tutorial #Screen printing machine man #First piece inspection #CooPrinter screen printing machine